Microsoft Power BI is a powerful reporting tool that helps you in visualizing data. In this article, we will learn how to connect Microsoft PowerBI to GrassBlade LRS and create useful reports from incoming data.
There are two ways to use PowerBI with GrassBlade LRS or GrassBlade Cloud LRS data.
Let’s take a look at both the options:
Automatic
We will use MySQL to connect both applications to use it with your on-premise database.
Requirements
- Install PowerBI on your PC or use the cloud version. We are going to use the PowerBI Desktop.
- GrassBlade LRS
- Domain Name or IP pointing to the database
- Database Name
- Database Username
- Database password
Collect this information to get started.
Step 1:
Launch Microsoft Power BI Tool
Step 2:
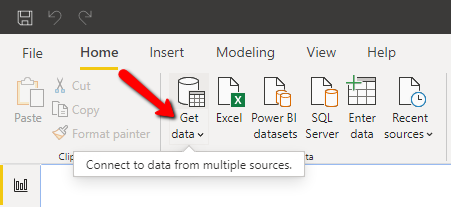
Click Get Data button.
Step 3:
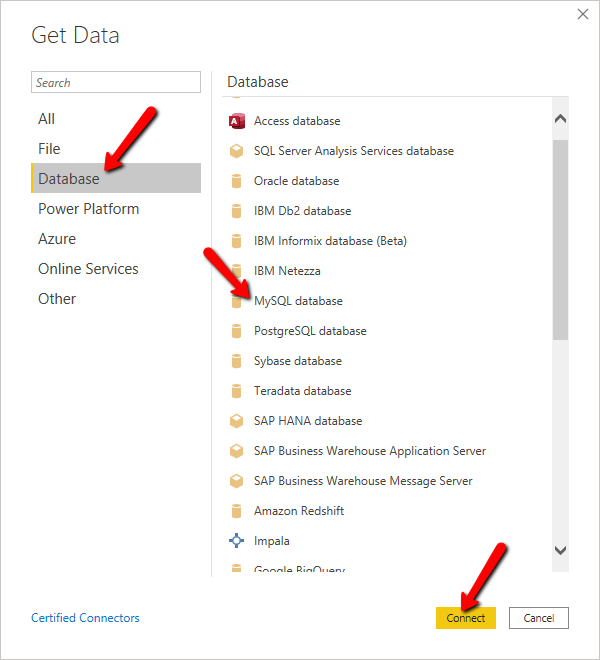
From Database select the MySQL database option and click the Connect button.
Step 4:
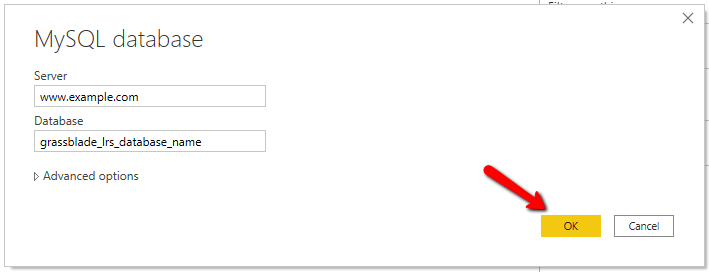
In the Server field, enter the Domain or IP address pointing to the GrassBlade LRS database. For example:
Domain: www.example.com
IP: 127.0.0.1
In the Database field, enter the name of GrassBlade LRS database and click the OK button proceed.
Step 5:
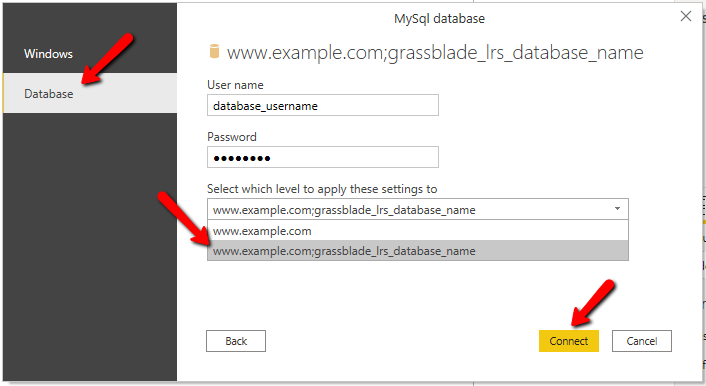
Go to Database tab and enter the Username and Password of the database. For “Select which level to apply these settings to”, choose the second option showing both domain and database name.
Click the Connect button to proceed.
Step 6:
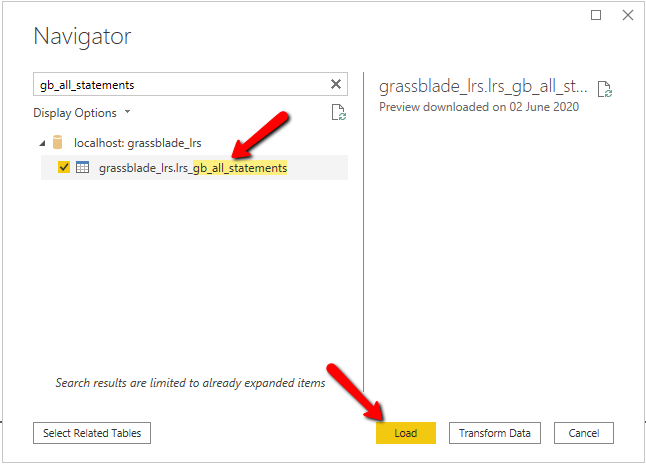
If you performed the above steps precisely and entered the correct username and password, it will show all the tables of the GrassBlade LRS database on the next screen.
This means you’re connected successfully, now search “gb_all_statements” table and select it.
Now click the Load button to fetch data from this table.
After processing it, you will see all the columns of the GrassBlade LRS on the right side of the screen.
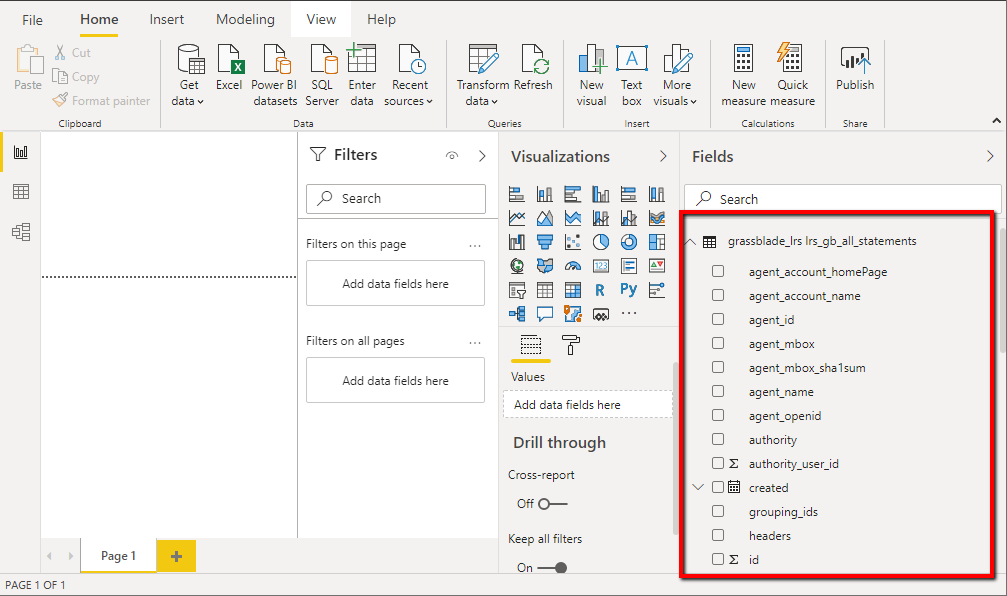
You can use these columns to create charts and reports as per need. Check video added below to learn how to connect and create reports.
Manual
In the manual option, we need to download the statements data in the CSV format from the GrassBlade LRS or GrassBlade Cloud LRS.
Step 1:
Login to your GrassBlade LRS.
Step 2:
Go to Reports > Activity Stream

Step 3:
Use filters to sort data and click the download icon.

Step 4:
In the download popup, select:
- Download Type: CSV
- Download Limit (rows): use default or enter a custom value
- Columns: Use the Selected Columns or All Columns option according to your needs.

Step 5:
Click the download now button to download the data.
Step 6:
Launch PowerBI.
Step 7:
Click the Get Data option

Step 8:
Select the File option from the left sidebar and Text/CSV from the right. Now click the connect button.

Step 9:
In this step, select the CSV file you downloaded from your computer.

Step 10:
Click the Load button to add data to the PowerBI.

Step 11:
Now, your PowerBI is ready with GrassBlade LRS data.

I hope you will find this information useful, if you’re facing any issues while using this process feel free to comment below.
For more latest and quick updates follow us on Facebook, Twitter, LinkedIn, and YouTube.

Hi Team,
I need a more detailed explanation of how to connect this to power BI.
Here are my doubts:
Server name: Would this be the unique name that you have provided us?
Database name: Is this something that I have to create or is this info something that I can find within my Grassblade LRS?
Username: Is this the username/email ID I’m currently using to access my LRS?
I would appreciate the clarification from your end.
Regards,
Is there a way to create a flow for LRS data with MS power automate?