
If you’re looking for a definitive guide to upload and track xAPI Content on Moodle LMS? Then you’re in the right place.
We made a better version of xAPI Launch Link called GrassBlade xAPI for Moodle. Learn more
Before getting started, let`s take look at the requirements:
- Running Moodle LMS
- xAPI Launch Link Plugin
- GrassBlade Cloud LRS or any other LRS
Click on the images to enlarge them.
This tutorial is divided into 3 parts:
- Connection with the GrassBlade Cloud LRS
- Adding or Uploading Content
- Tracking Reports in LRS.
In this tutorial, I’m using GrassBlade Cloud LRS. You can use this or any other Learning Record Store.
Why Learning Record Store?
In any xAPI environment, a Learning Record Store is a necessary element. Your content will only play if it has the correct launch URL. Which includes details of your LRS.
Connection with the GrassBlade Cloud LRS
Step 1:
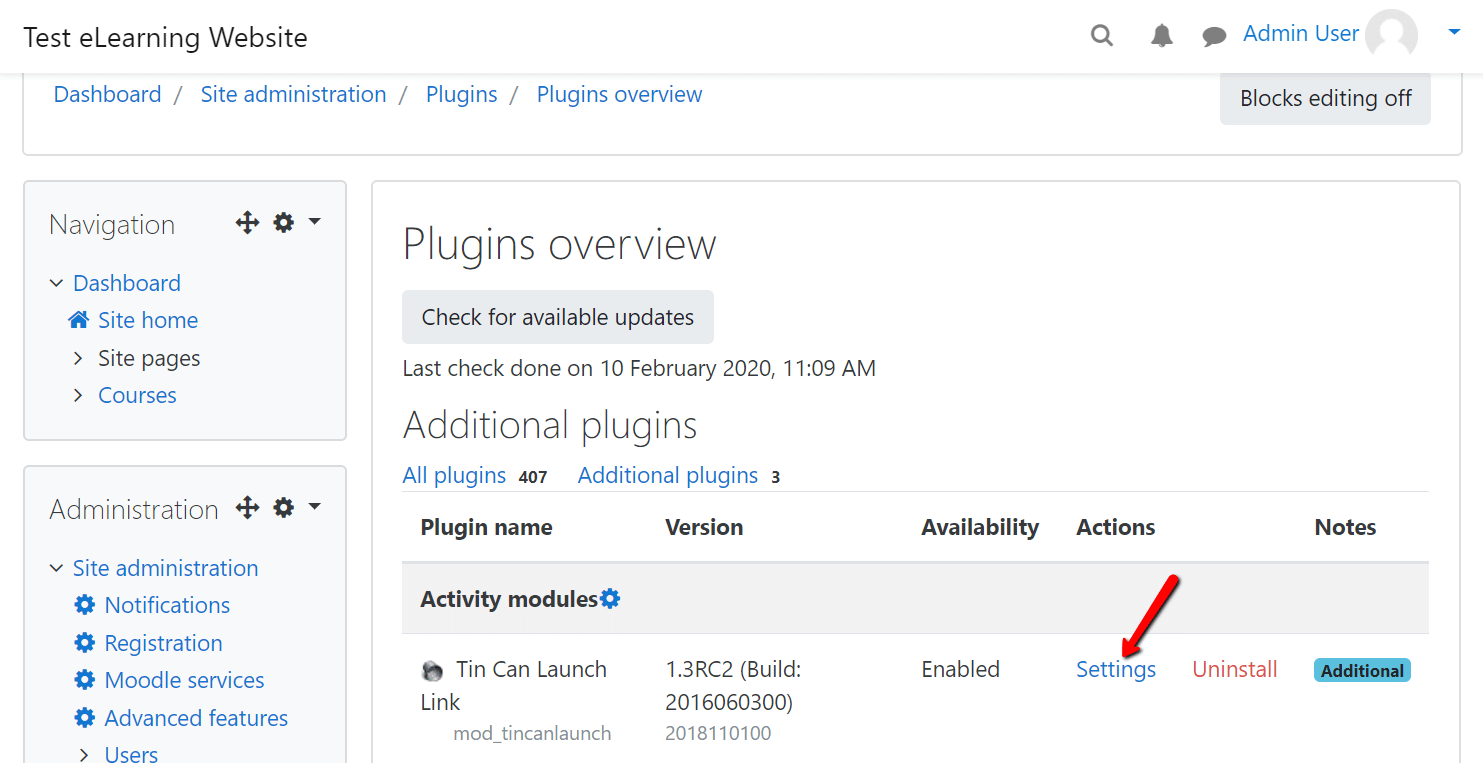
Go to Dashboard > Site administration > Plugins > Plugins overview > Additional Plugins.
Step 2:
Find the plugin you have installed previously named “Tin Can Launch Link,” and click on the settings. You can do these settings while plugin installation.
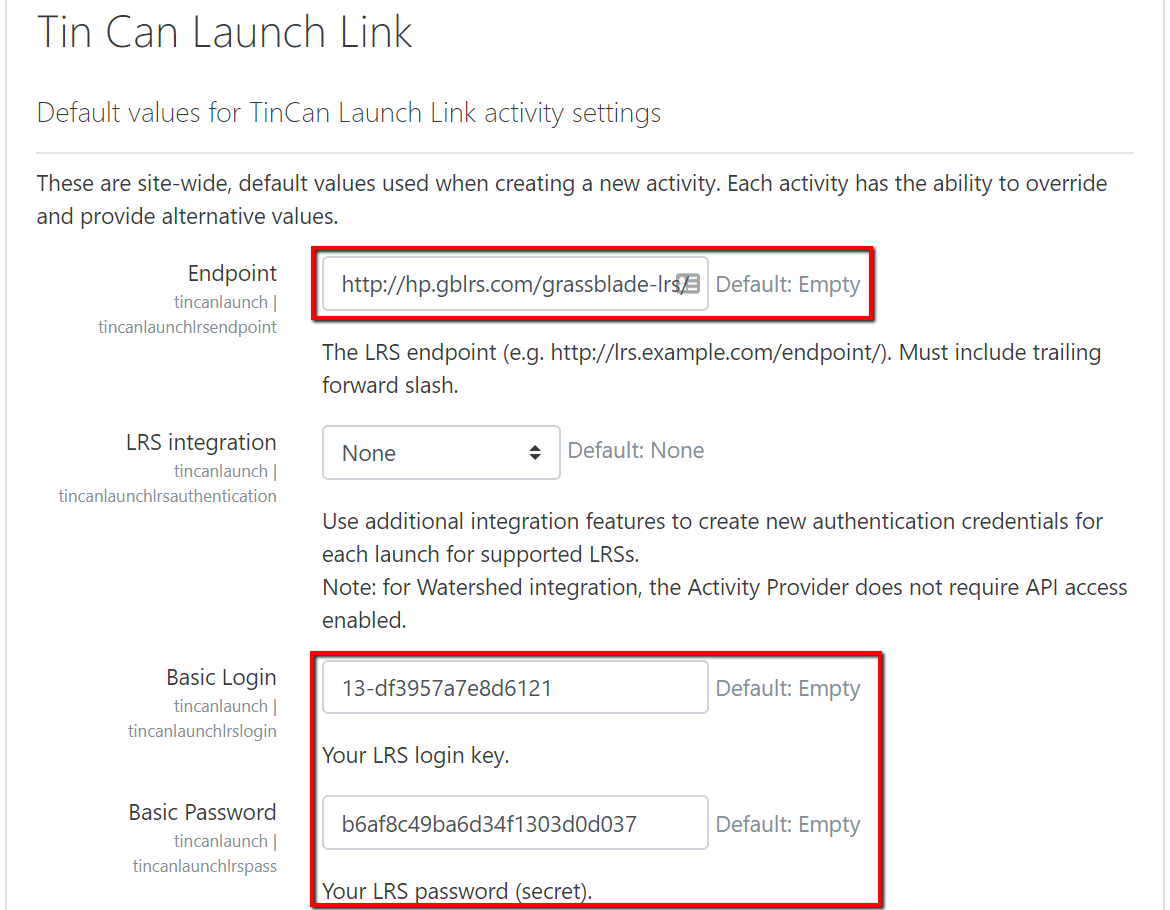
1. Endpoint: http://lrs.example.com/endpoint/
2. AuthUser: 155-df3957a7e8d6121
3. AuthPass: b6af8c49ba6d34f1303d0d037
GrassBlade Cloud LRS user can find these details here.
Step 3:
Enter LRS authentication details here:
Step 4:
Click save changes to update.
You have successfully connected your LRS with Moodle.
Adding xAPI Content in Course
Step 5:
Add a New Course Course, use official documentation for this process.
Step 6:
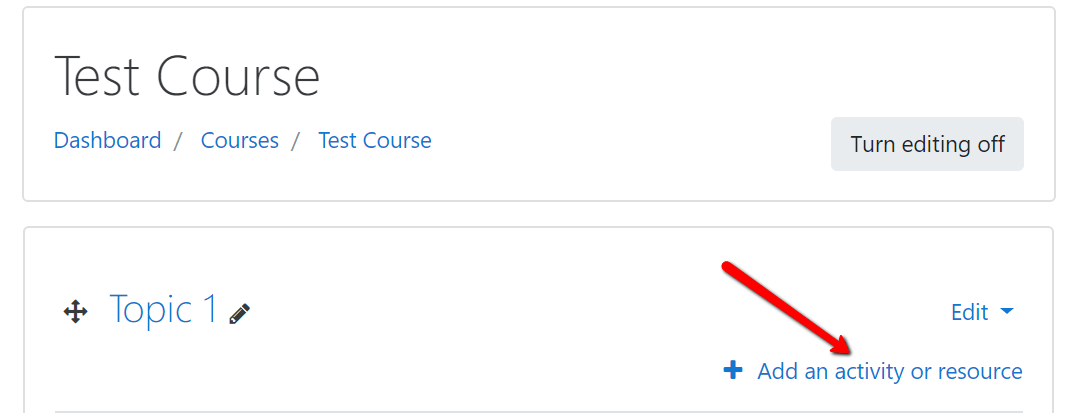
Click on “Add an Activity or Resource” link, you can see this option under every topic.
Step 7:
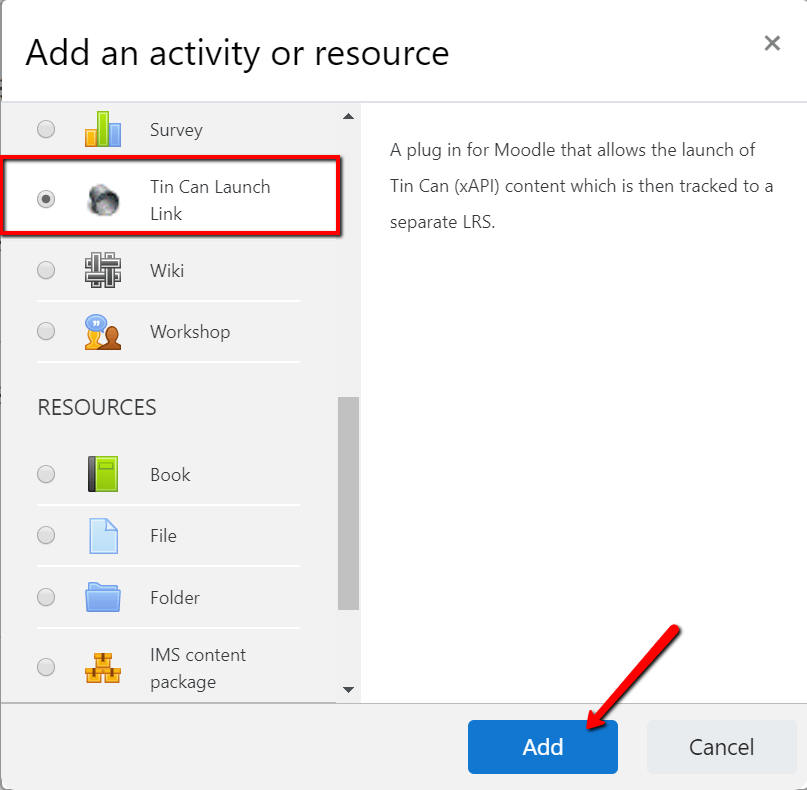
Select TinCan Launch Link option from the left sidebar and click Add button.
Step 7:
Enter basic details for your xAPI Content in General tab. On the Launch Settings tab, you can use hosted content on another server using the content URL or upload content zip on this server.
Step 8:
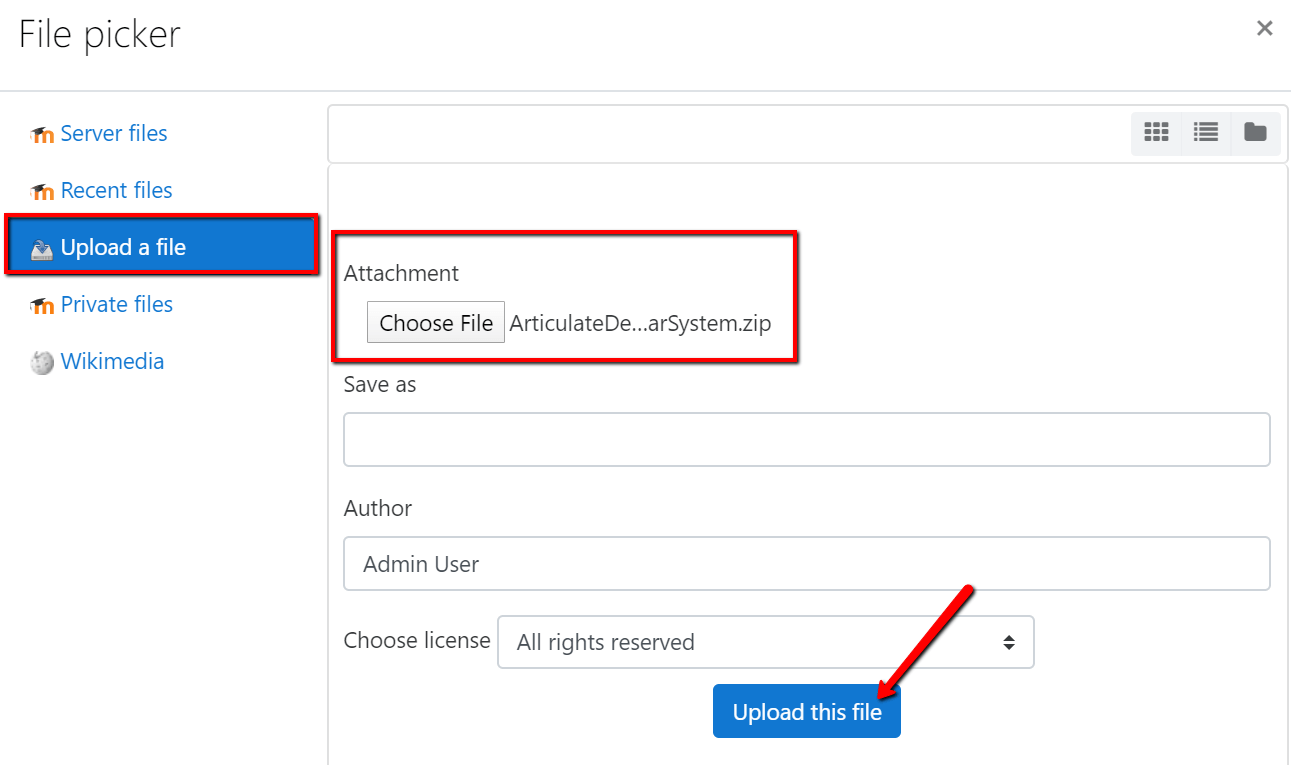
Zip Package: Click on the down arrow and, select Upload a File option from the file picker.
Step 9:
Click Choose File option and select the xAPI content zip file from your computer.
Step 10:
Click Upload this file button to save.
Step 11:
Check other appropriate options as per need and click the Save and return to course button.

Step 12:
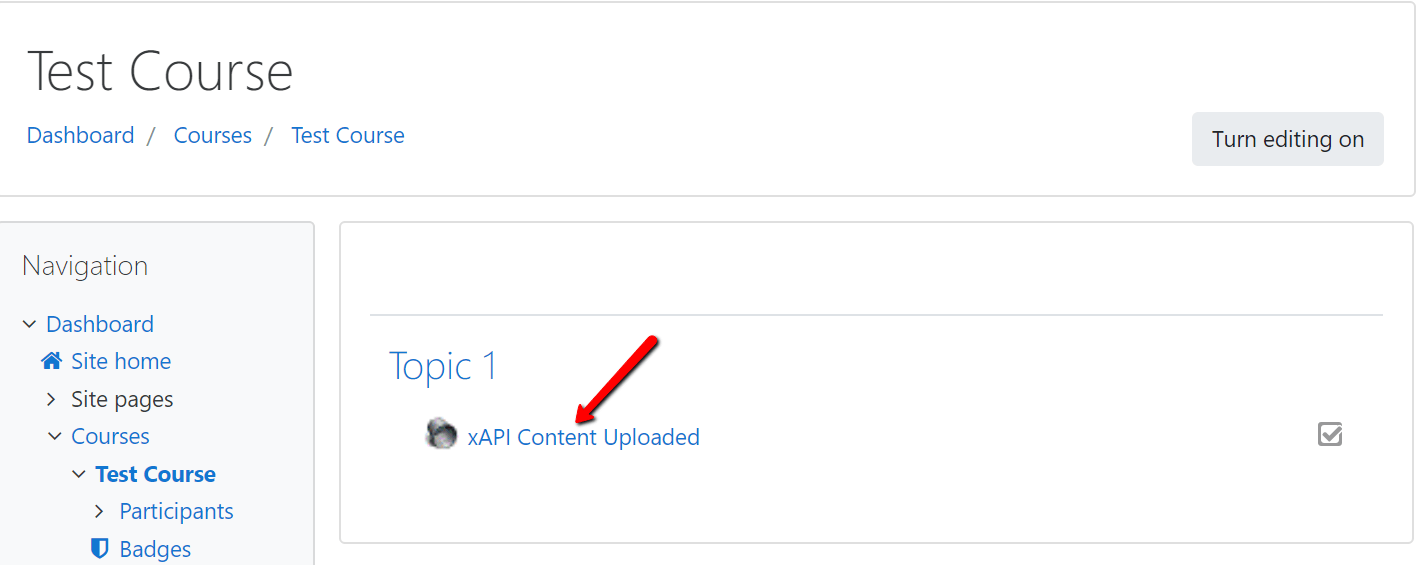
Go to the course page and click on the added content to attempt.
Step 13:
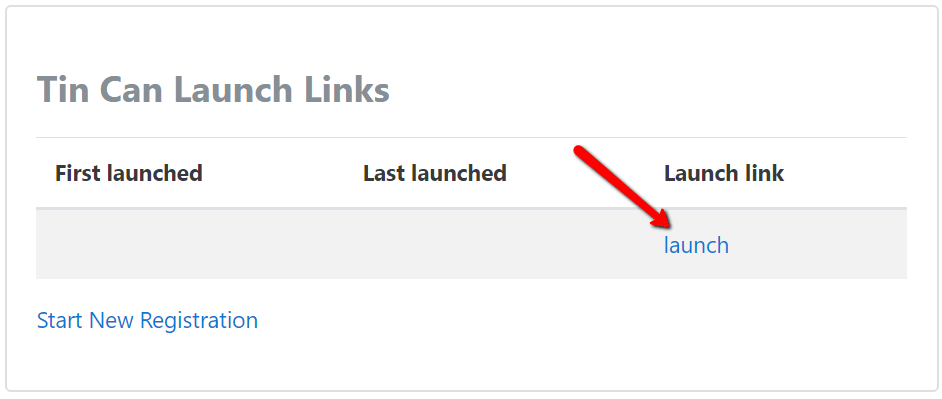
Click the Launch button to play your content. It will be launched in NewTab, you can edit your content settings by editing it.
Step 14:
Complete the content to check reports in the Learning Record Store.
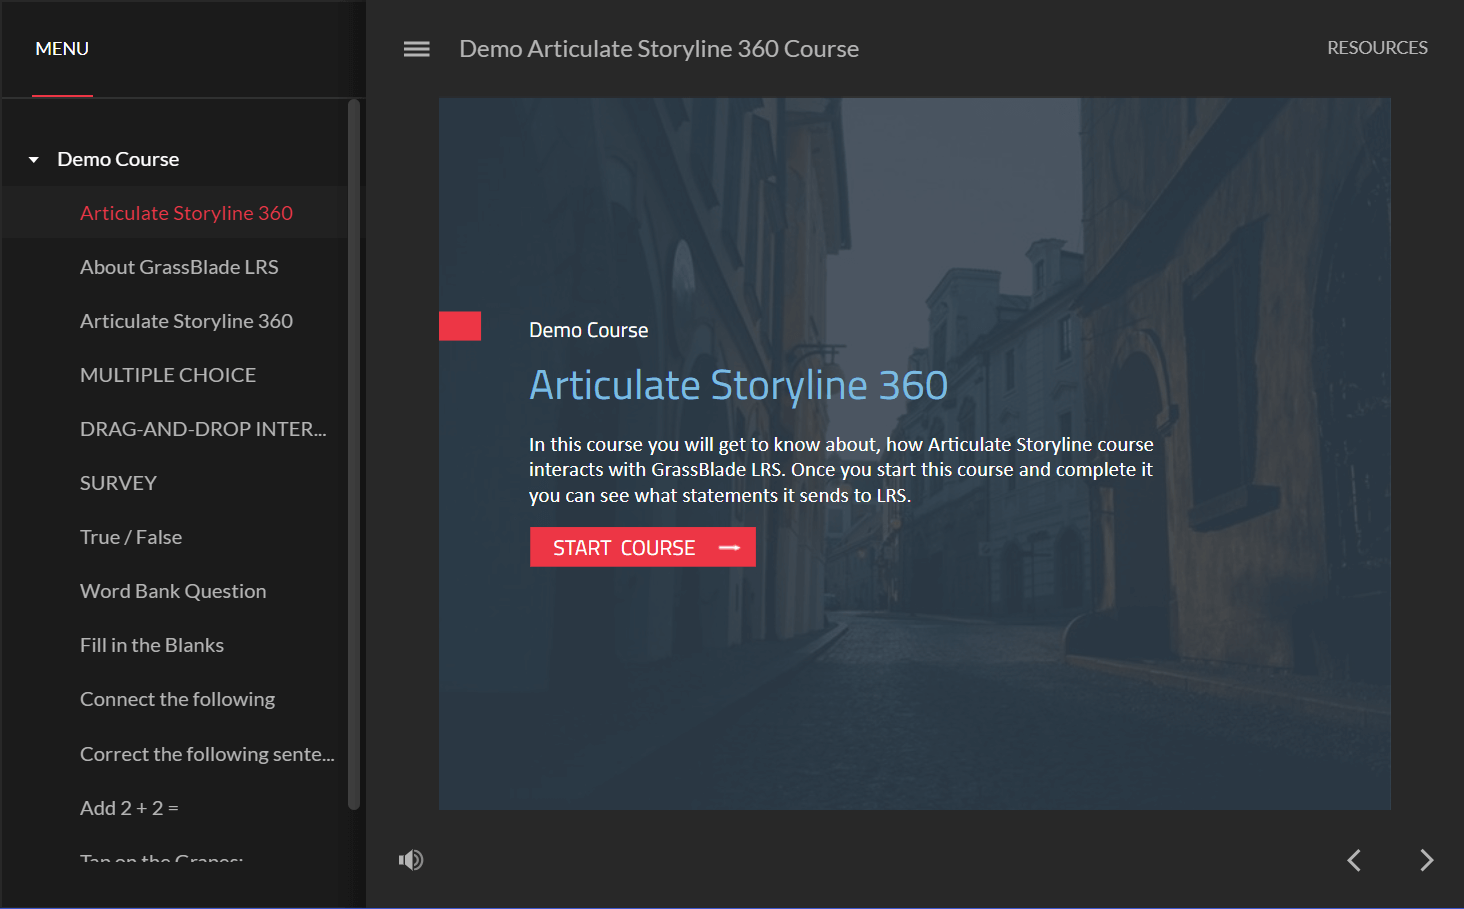
After completion, you can check the content details in your LRS. In my case, it is GrassBlade Cloud LRS.
Check Reports in LRS
Step 15:
Go to GrassBlade Cloud LRS, click Statements Widget.
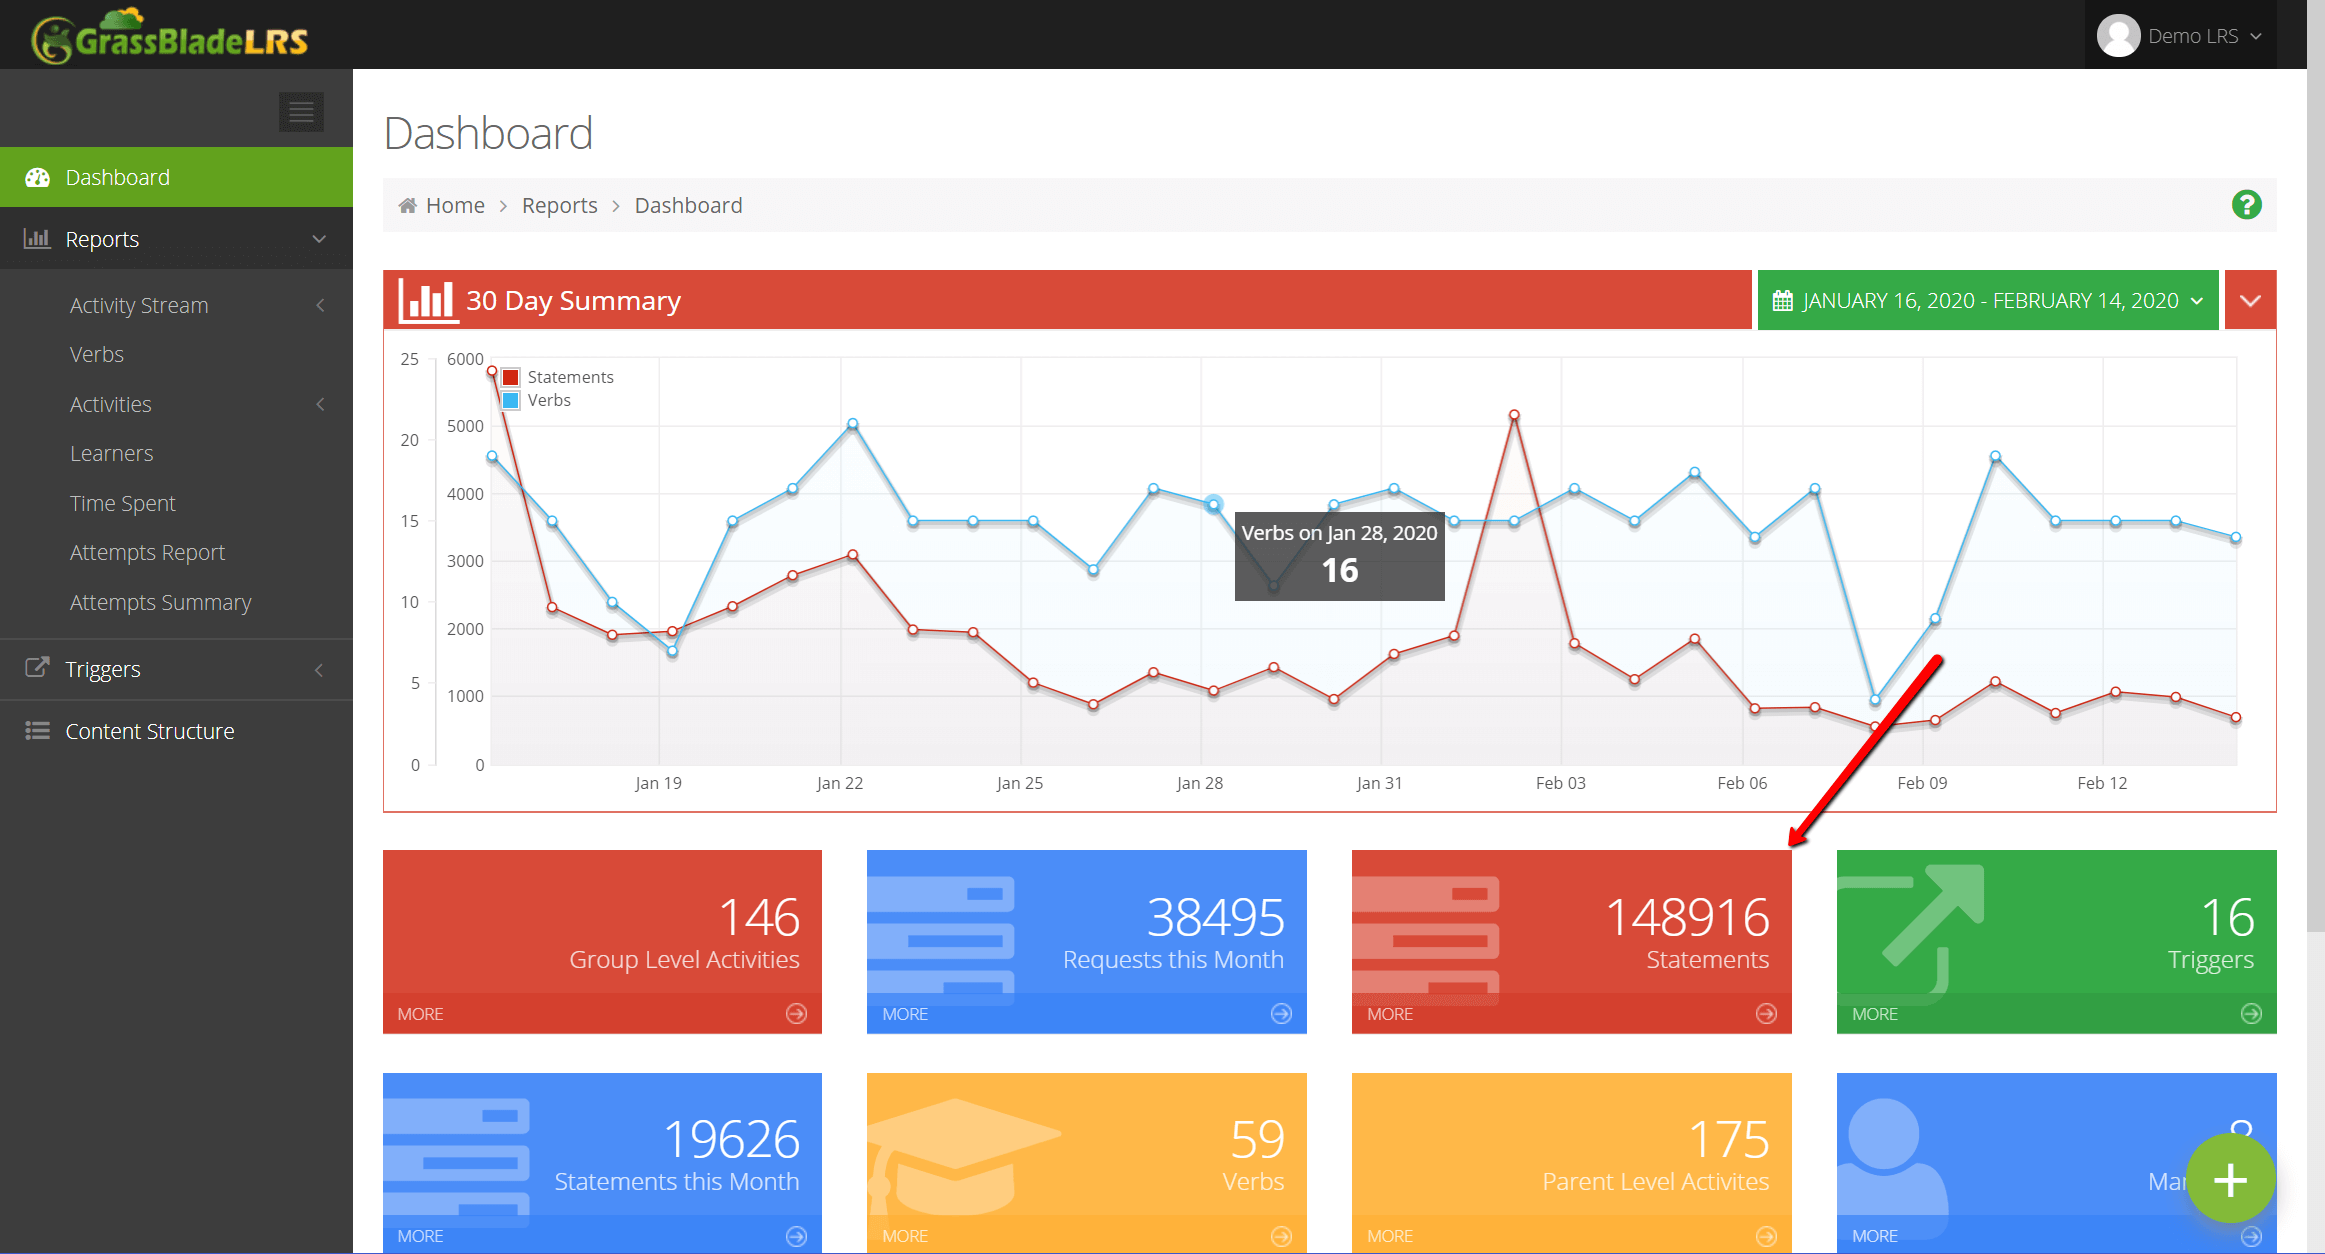
Step 15:
Check highlighted parts on the statements.
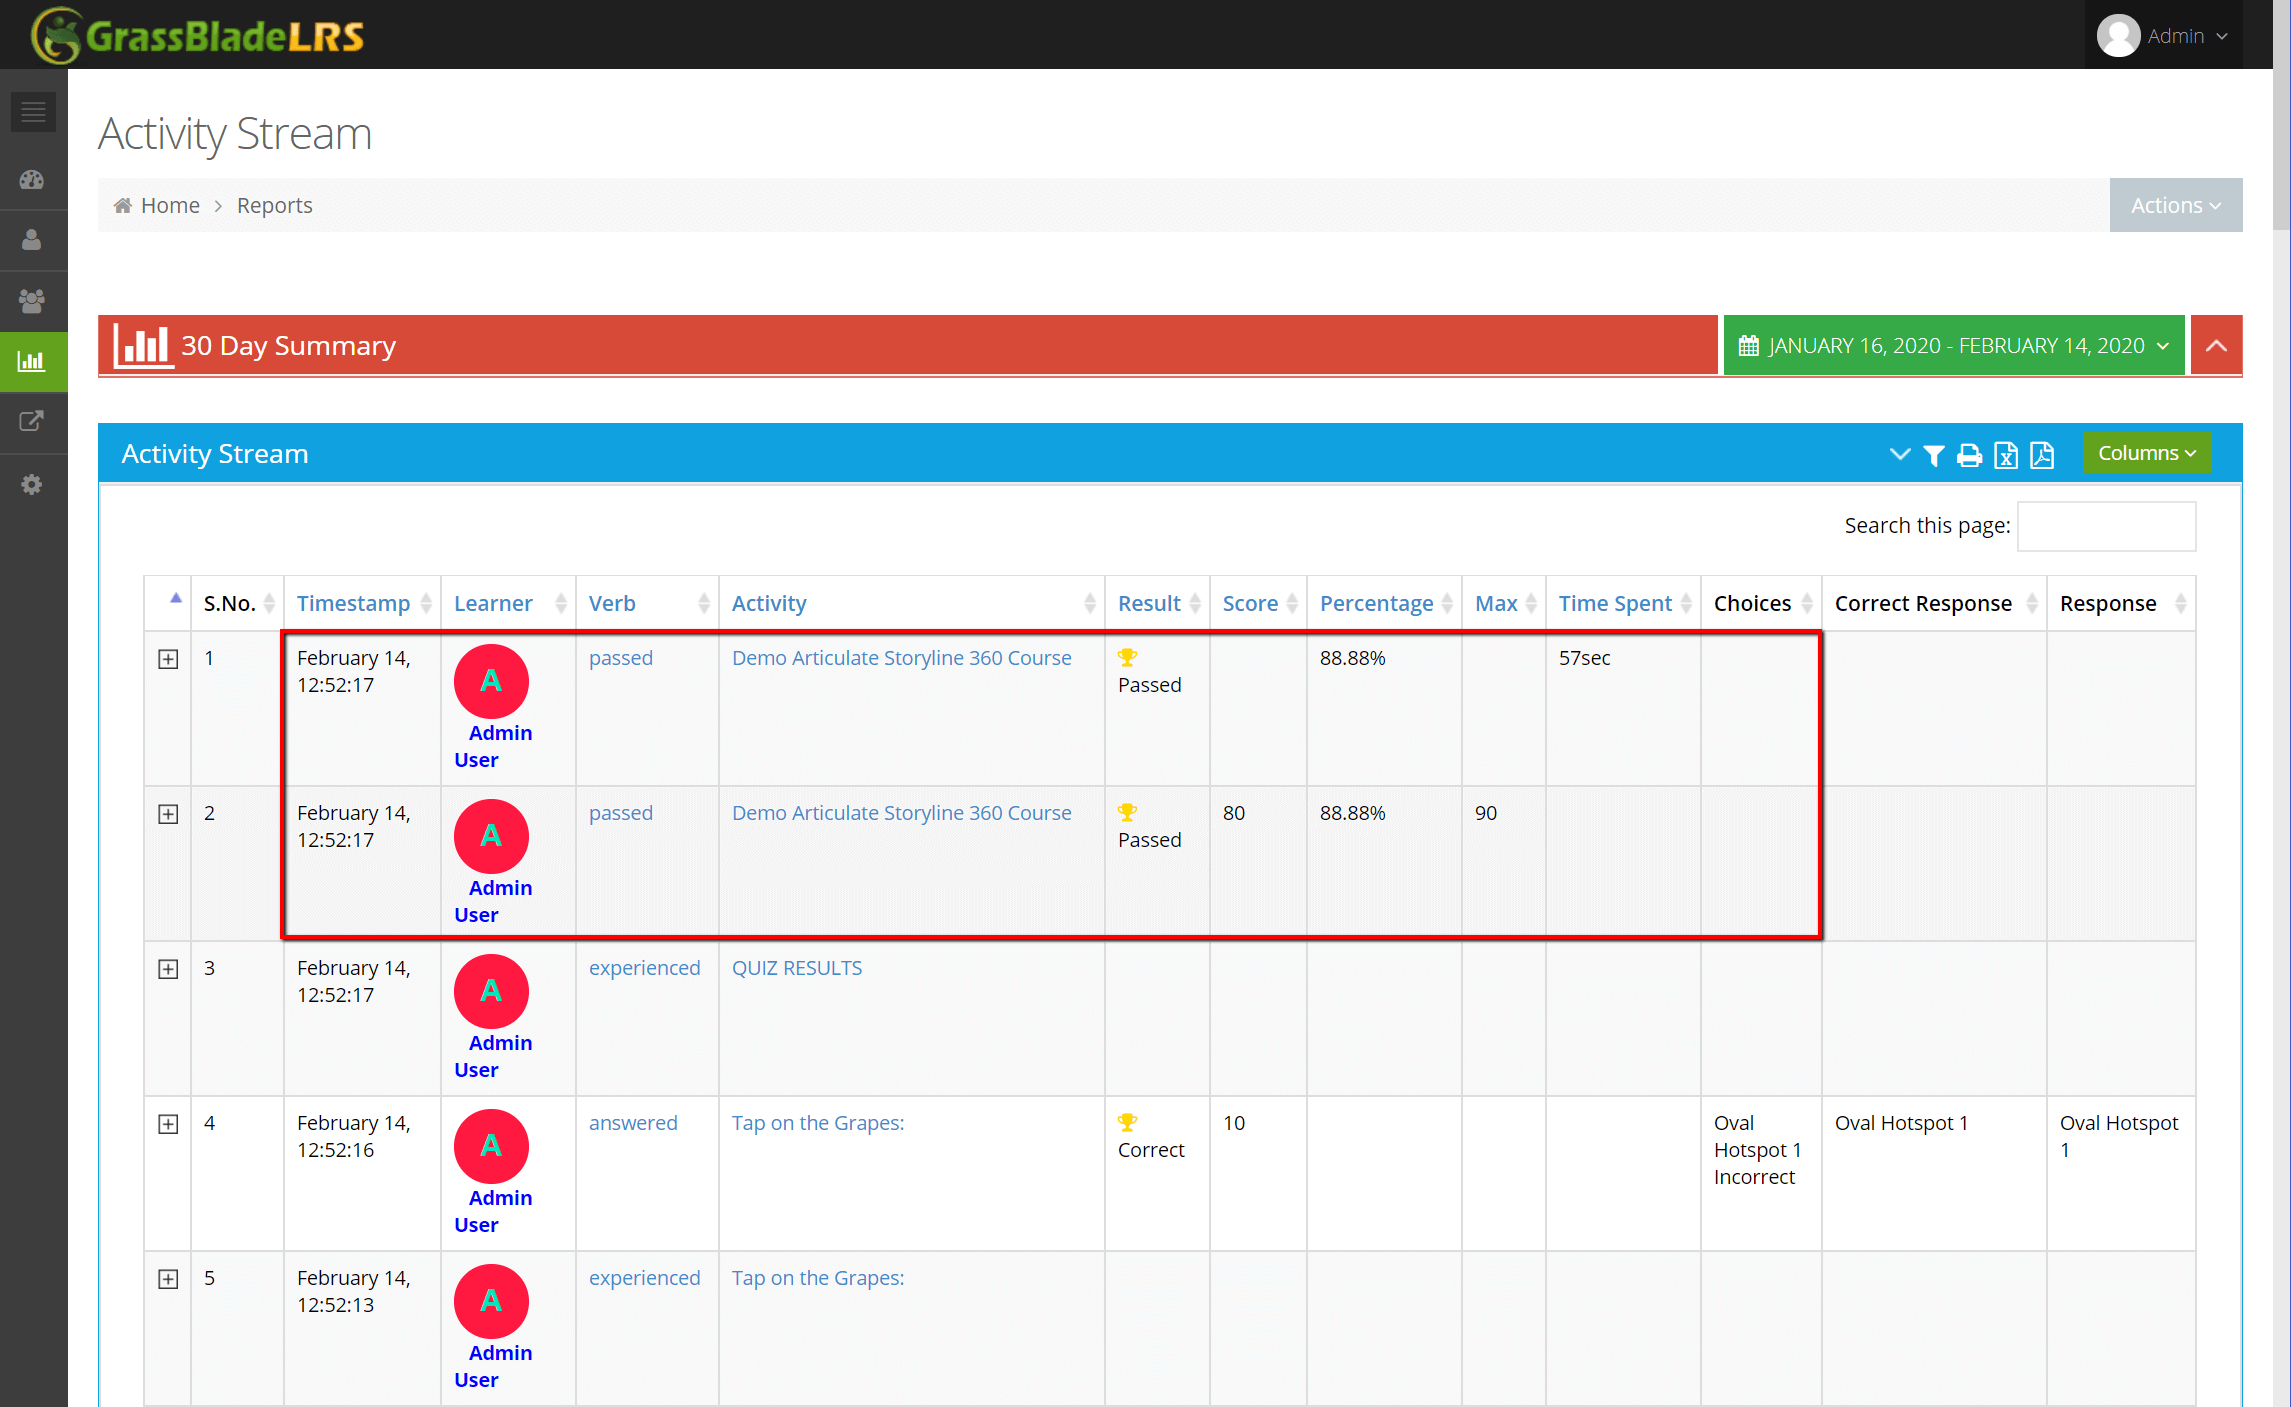
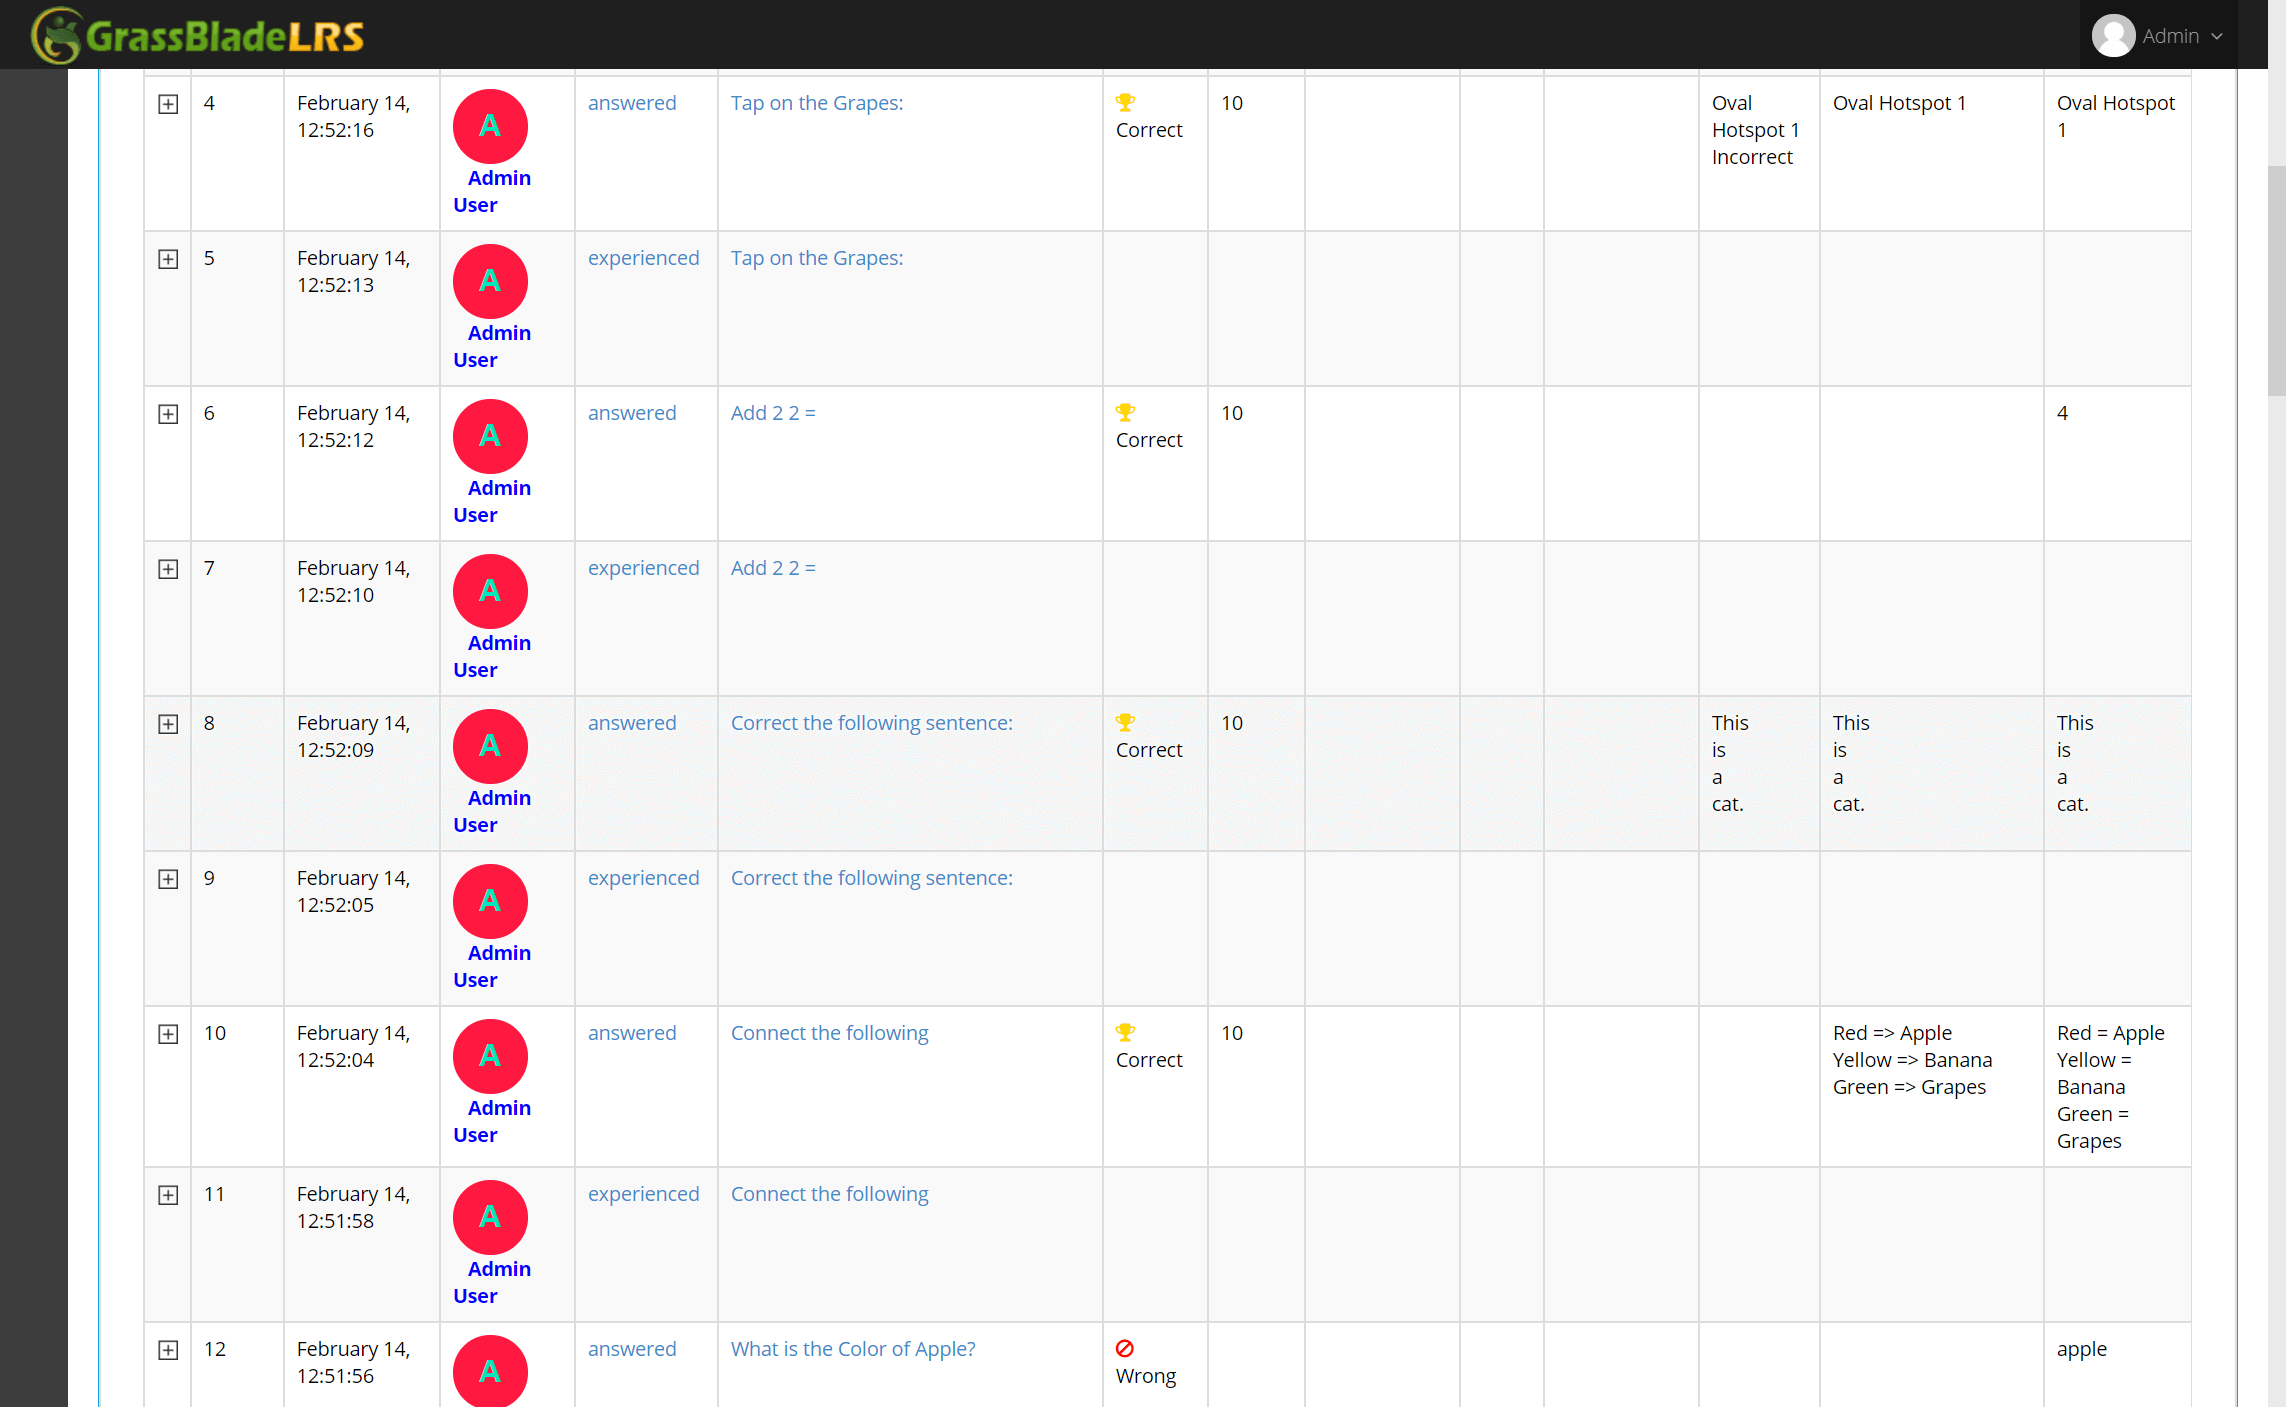
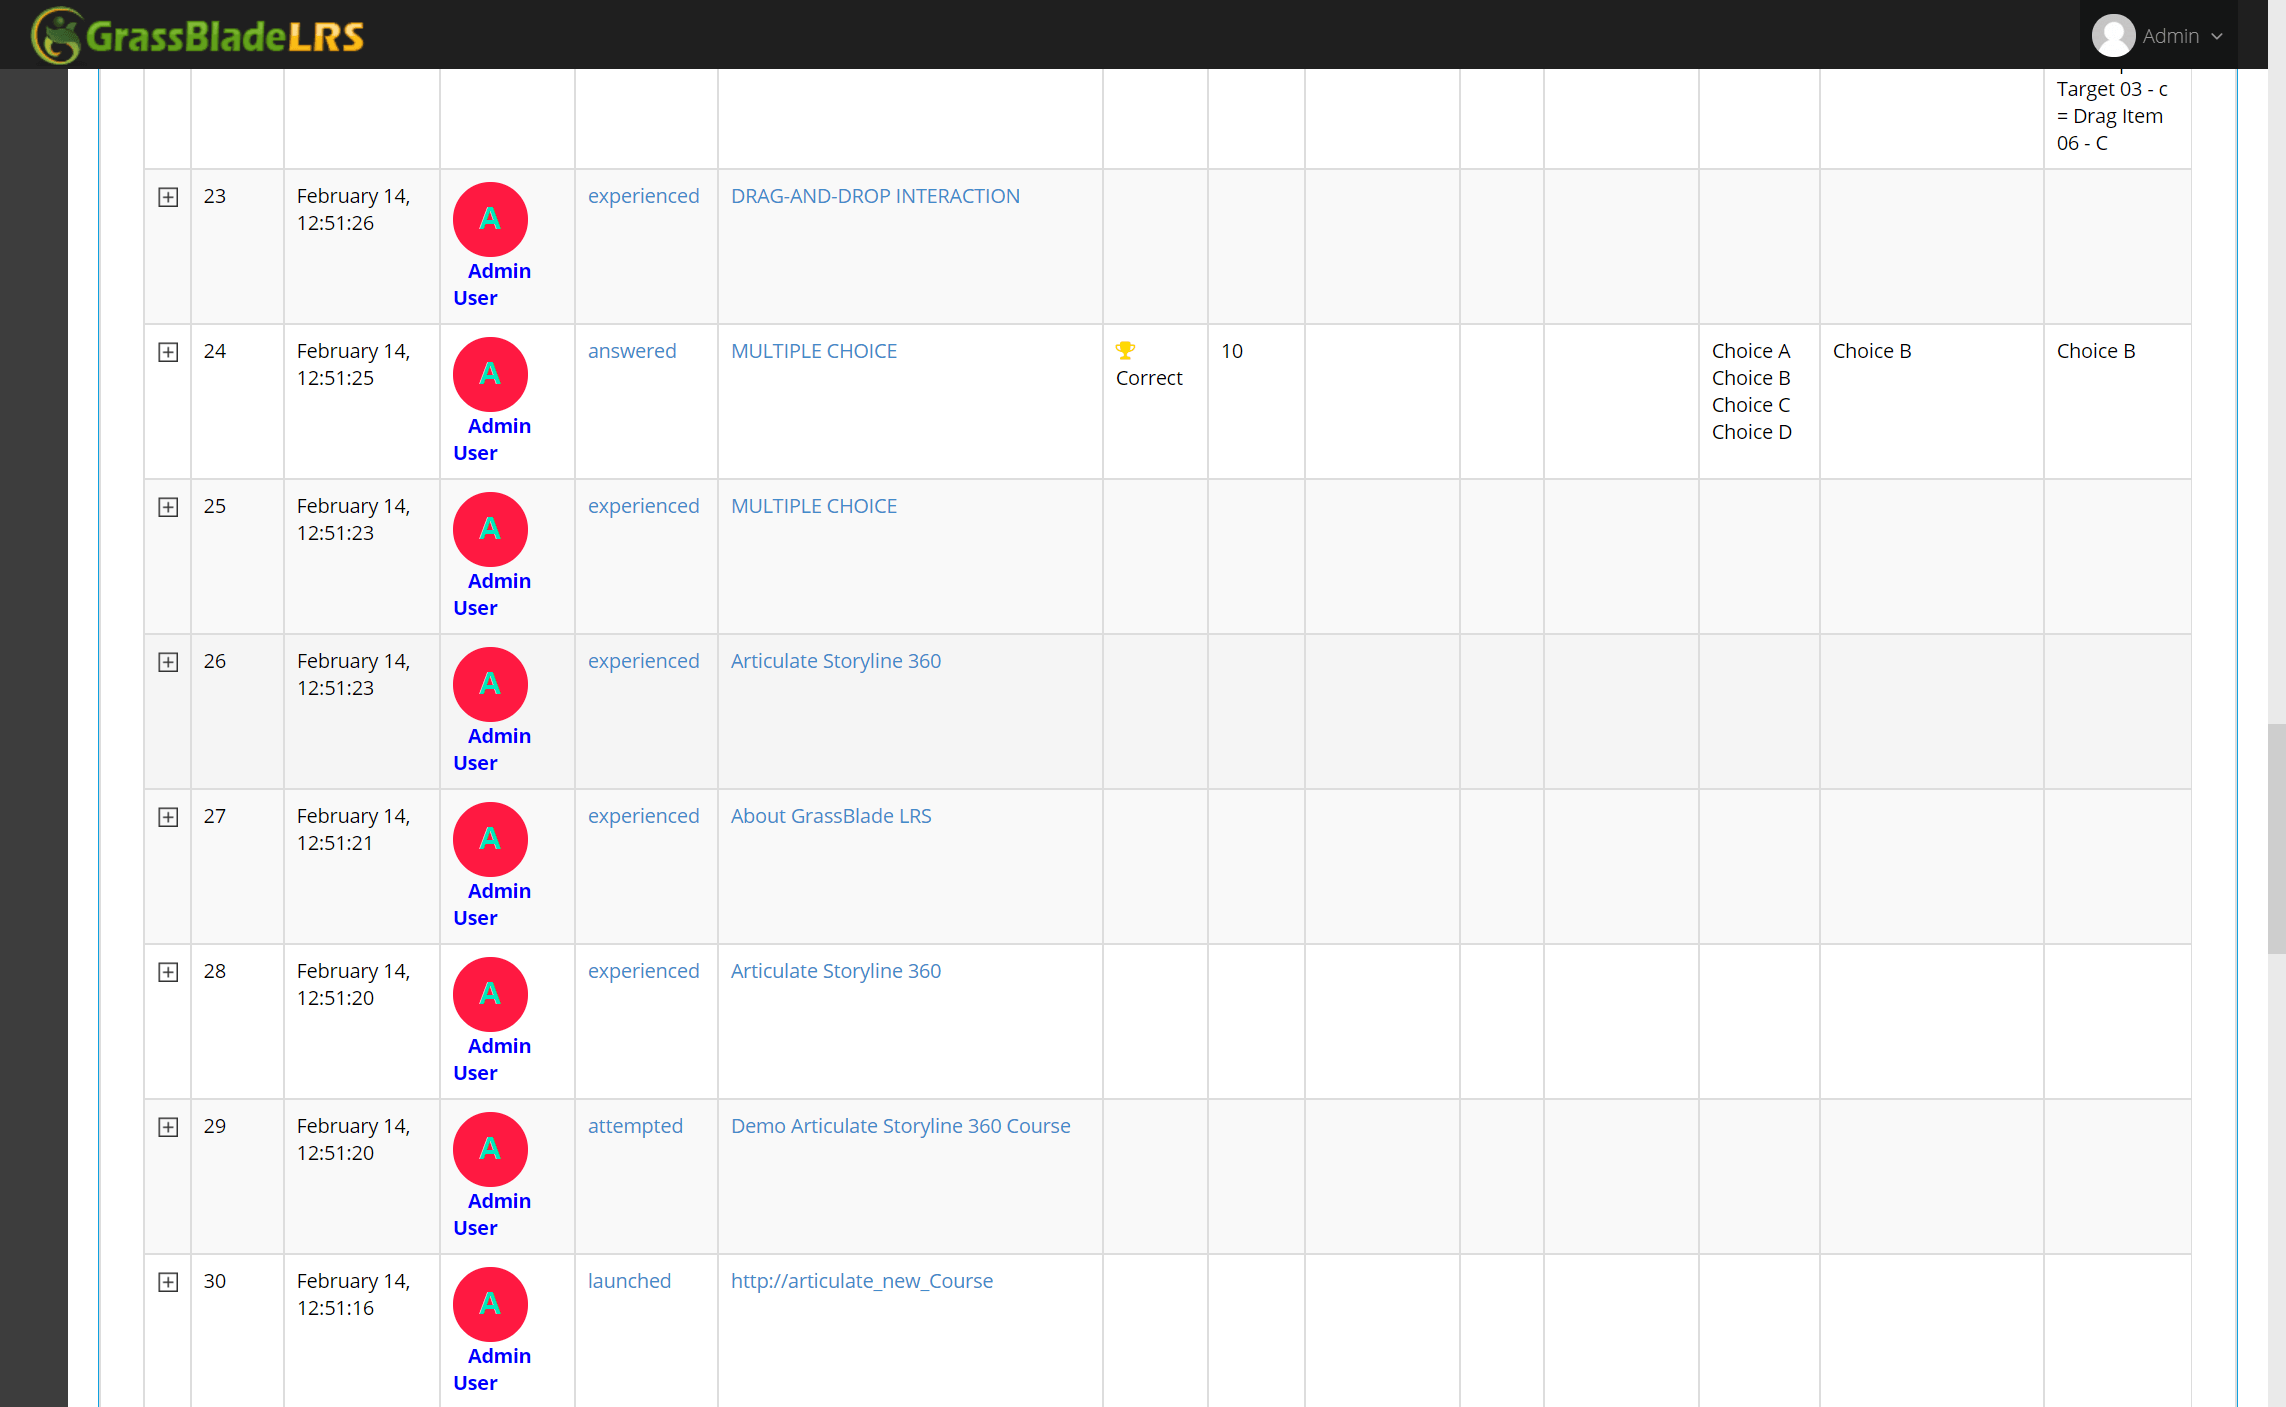
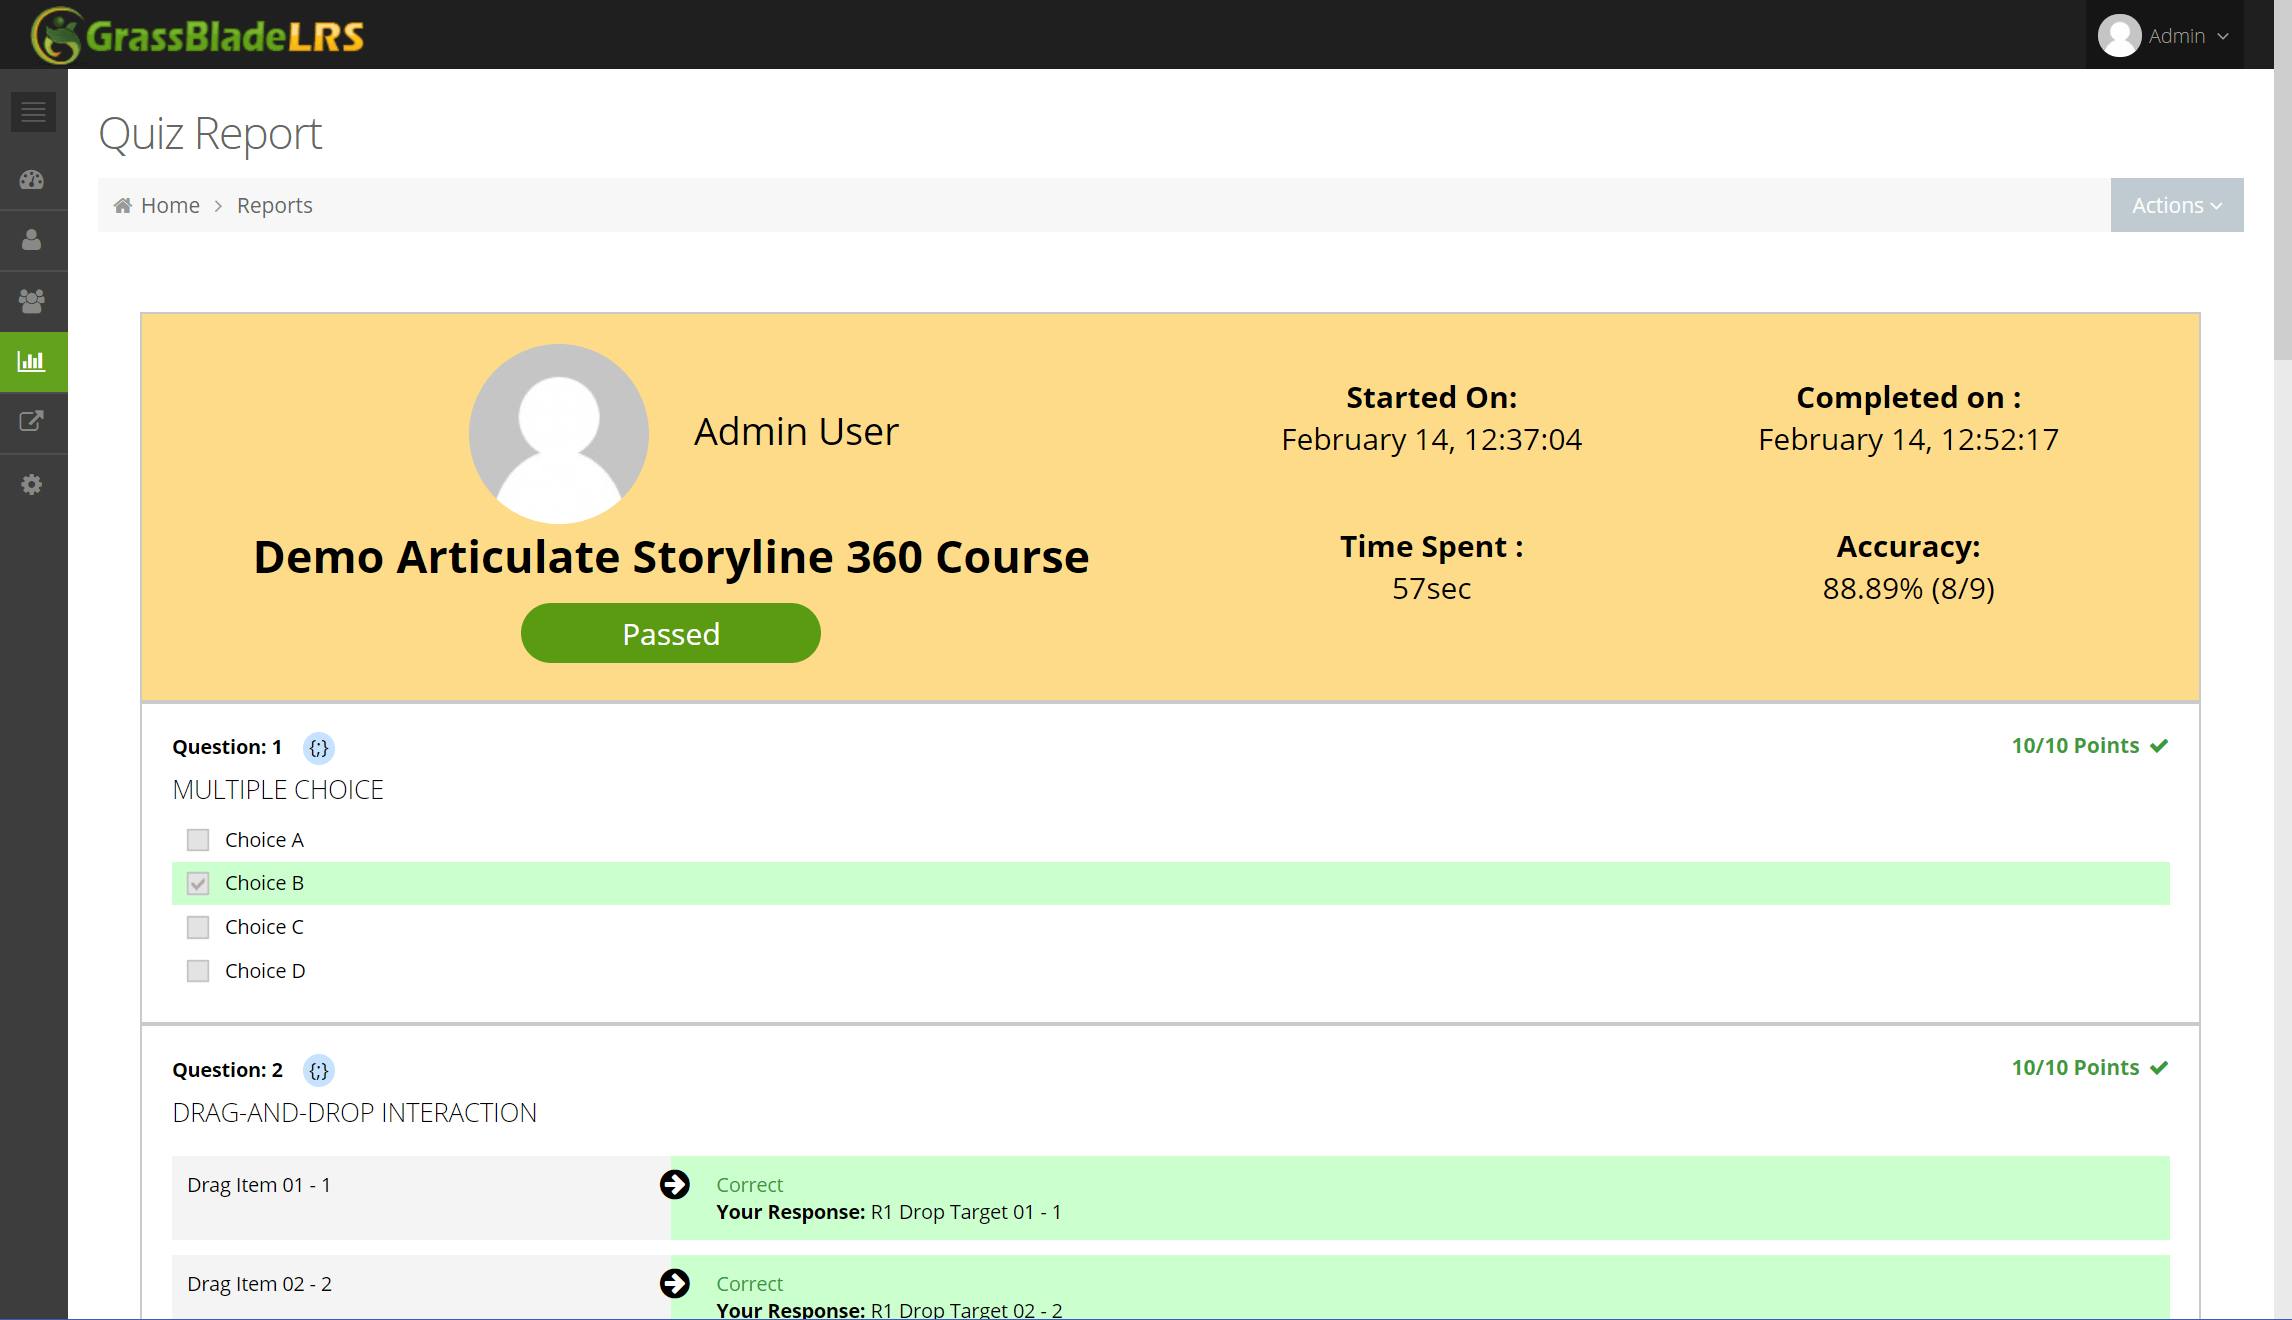
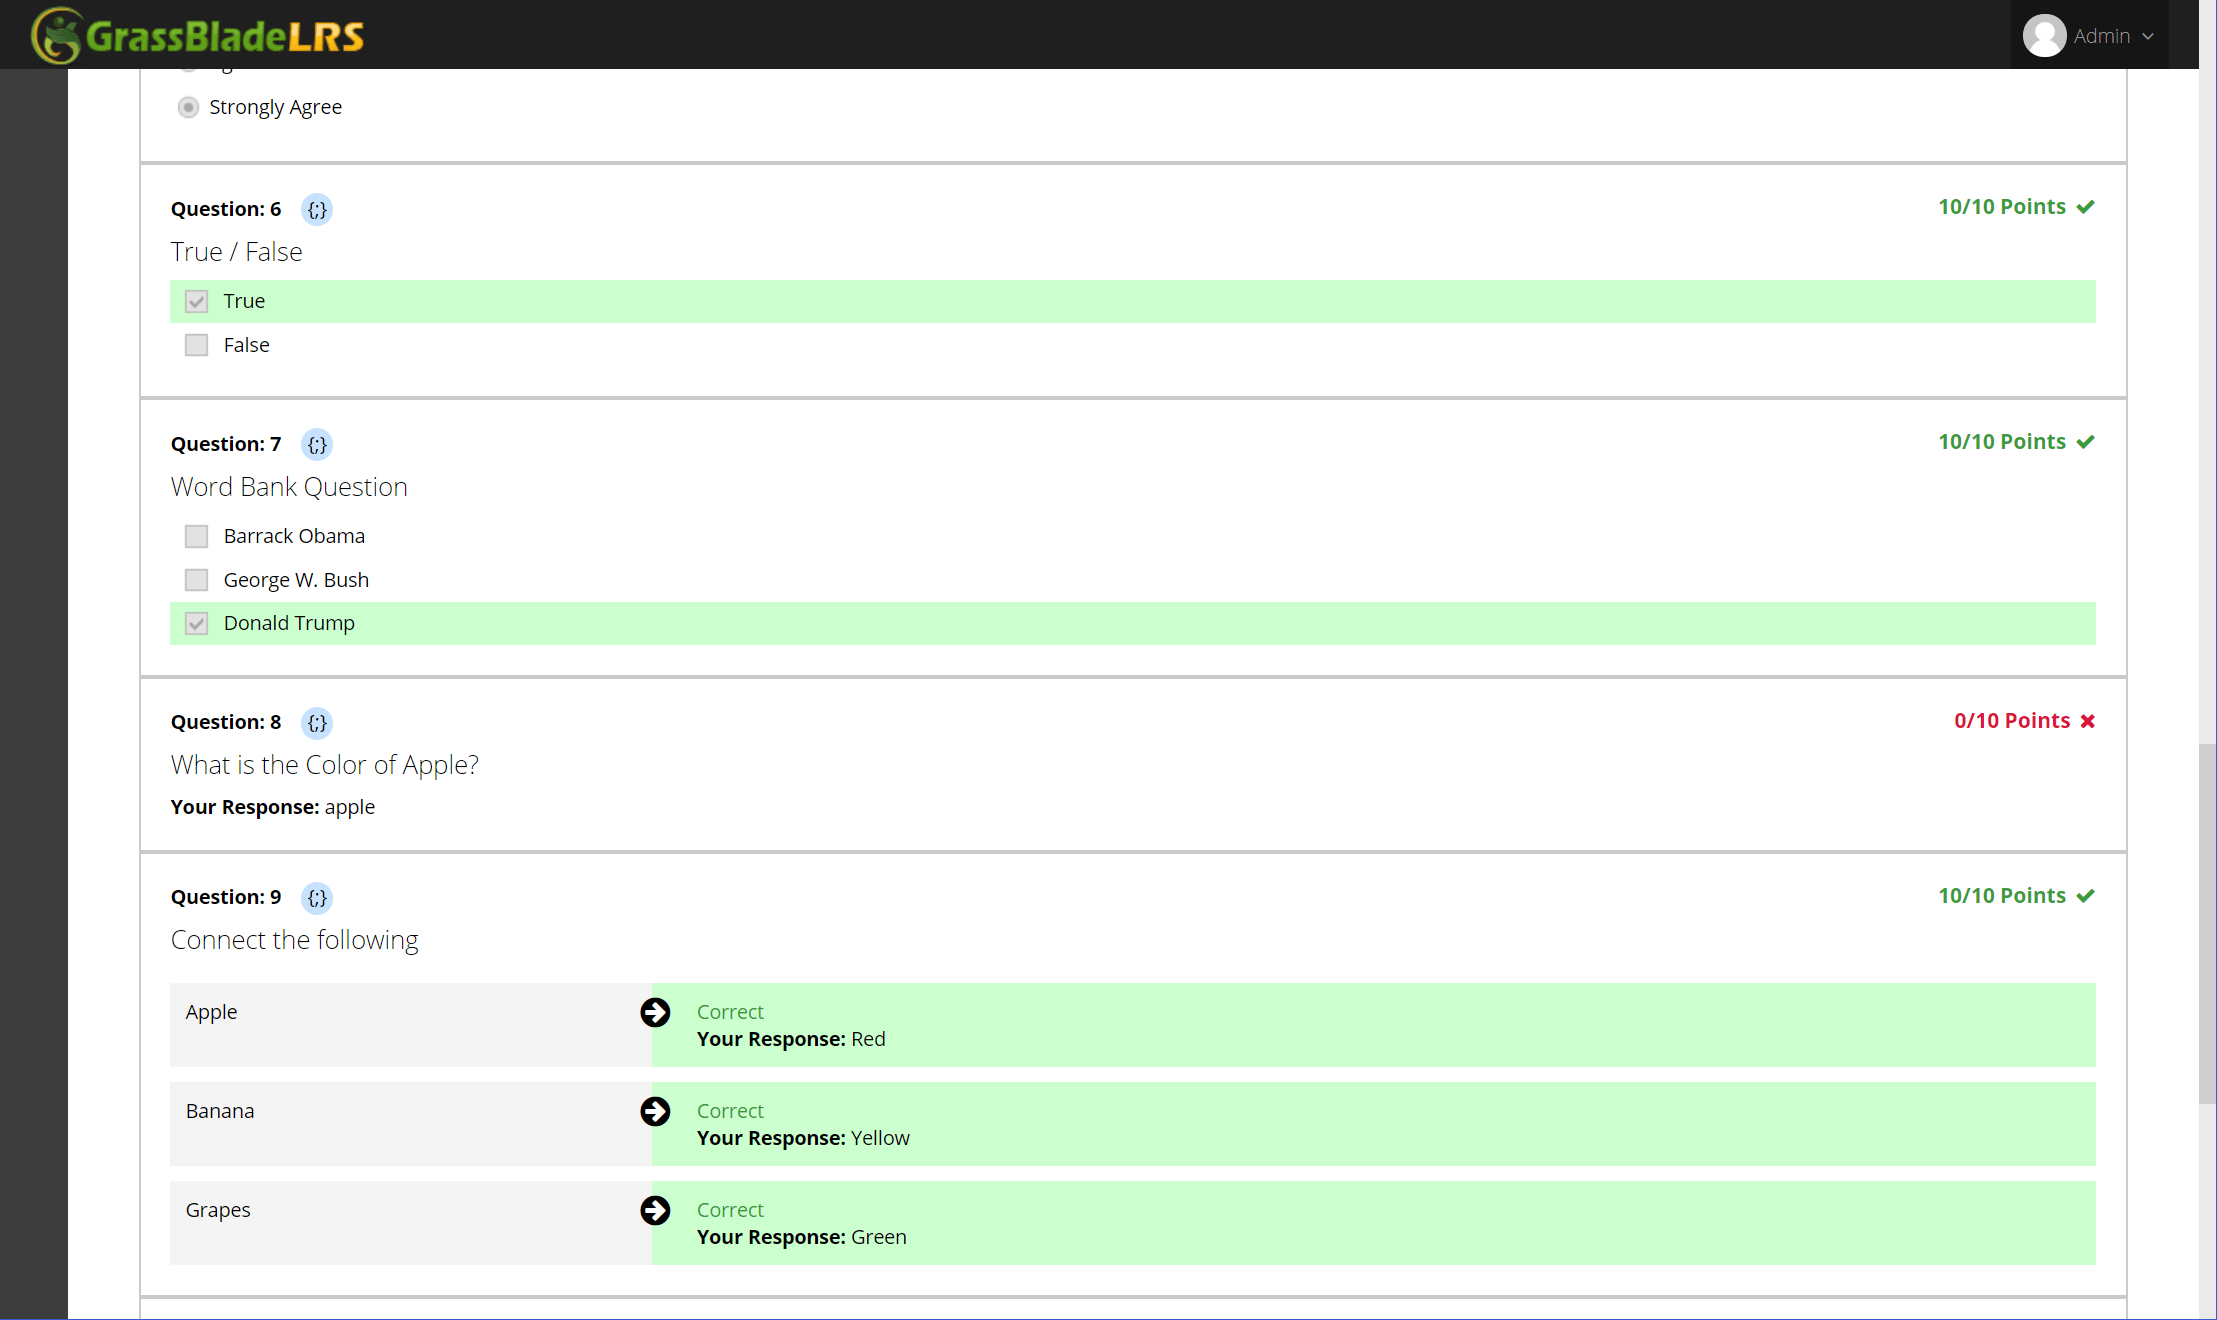
You can also check Rich Quiz Reports in the LRS, follow this tutorial.
Conclusion
Moodle does not provide native support for Experience API but you can follow this method to upload, add and track xAPI Content on your Moodle LMS. It allows adding content hosted somewhere else or you can upload content on the moodle server.
Here reporting depends on the LRS, GrassBlade Cloud LRS can be your option or any other LRS you like.
For more latest and quick updates, follow us on Facebook, Twitter, LinkedIn and YouTube.

Hi everyone. First of all, congratulations with the explanation of the install and upload the plugin.
I have a question. I dont know how to report my own verbs. i use the plugin and all of my own verbs like “passed”,”checked”,”completed” become in default verbs like “experienced” or “passed”.
is possible to report custom verbs? Can you explain me how to do to report with the plugin my own verbs?
Thanks.
Hi Pablo,
I never tried to track custom activities or sending custom statements. You might need to check with xAPI Launch Link plugin devs, they can guide you better.
If you have any queries related to GrassBlade Products, feel free to reach us.
Any info on how to do this with Rise or native Moodle quizzes?
You can put Rise 360 xAPI content on Moodle by following the same process. We made a new integration plugin for Moodle.
Please check this page and watch video: https://www.nextsoftwaresolutions.com/kb/grassblade-xapi-for-moodle/
Saurabh